Perspectives and Counters
Library templates are very useful for saving your animation assets for future re-use. But here are a couple of useful examples of other ways to use your library templates as aids in doing your animation work.
The first template is a frames counter. I can't keep track of how many times I would have wanted to have the current frame number displayed while I was watching a playback test. The playback viewer has a time code counter but I often see a problem and want to isolate the frame or frames where that problem exists. It also is useful in isolating sound to action sync problems. So I created a "counter" template. Now it isn't a sophisticated device, but rather a sequence of cells in an element where each cell is numbered to match the frame it occupies. For my purposes I found that 300 was a good number of frames that more often than not fit any sequence I wanted to test. Now it took a little time to create and number 300 cells but it's a one time task and you save it as a global library template and then your counter is available for any future project use. You will see it in action in a minute.
Another area in which I always find myself wanting some help is with my drawing perspective. I use to just make some guide marks in a scratch element. Then I decided that I was doing this quite frequently and so I started making and saving perspective grids as global library templates. Now whenever I need a perspective reference I can just pull out the template and put it in a reference element in any project.

Below are some samples of templates I use for perspective references in my drawing.
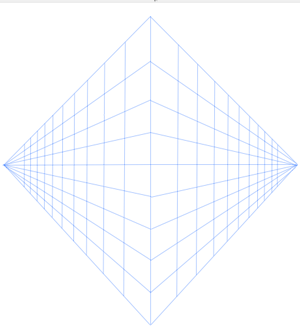
This template is a two point perspective reference with a below center horizon line which is great for a viewpoint looking up from ground level or "worm's eye" view.
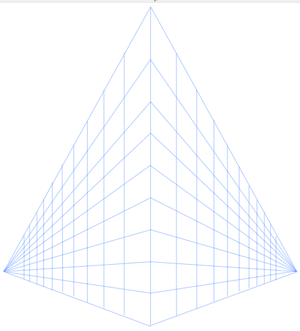
This perspective grid template has the horizon line above the middle and is useful for a more elevated view reference.
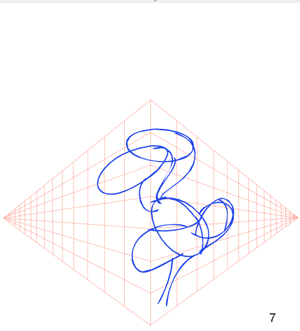
This is a three point perspective grid template.
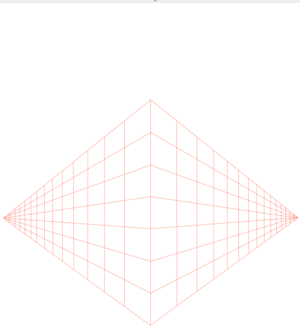
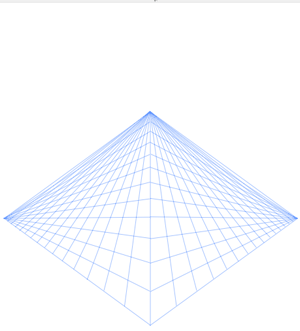
This perspective template is a neutral or eye level two point grid and I use this one quite often as you will see in the animation work below.
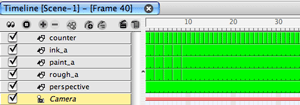
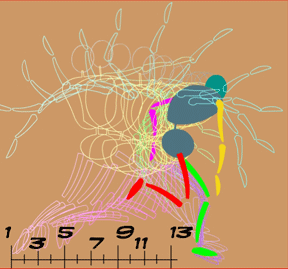
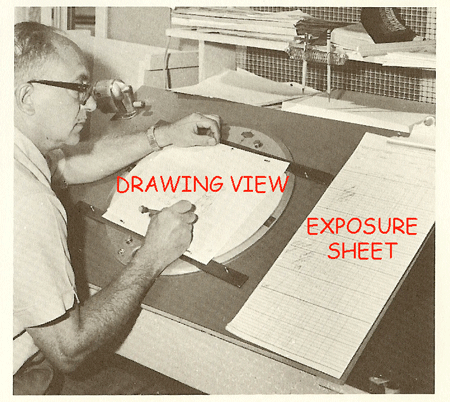
This is the timeline I'm using for this example project. I've created an element named "counter" for my frames counter template and placed it above the other elements to superimpose the frame count. If I don't want this frame count to be included in the final render all I need to do is un-check its timeline track label. I also have an element included named "perspective" which I'm using for my two point eye level perspective grid template. It is one cell with its exposure extended for the desired time I want the reference visible. Again when I don't want this included in the render I just un-check the perspective element's timeline track label. I put it at the bottom of the list so it is behind my drawings. I normally work on sketching in drawing view with the field guide grid turned off when I'm using a perspective grid because it makes things less cluttered. I can always toggle the field guide on and off if I need to check a field size.
I'm working here in drawing view with the field grid toggled "off " and the auto-light table turned "on" so that my perspective grid is visible below where I am sketching. It really makes it easier to draw solid and maintain proper perspective with this visual aid. The color of the perspective grid is a personal choice and is easy to change. Notice that the frame number is also visible. That's a nice bonus when using the counter template.
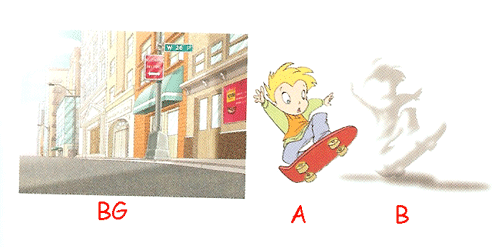
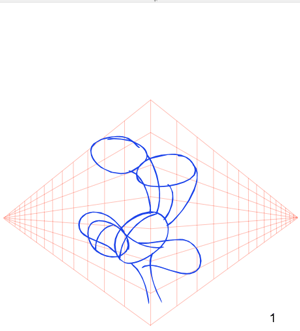
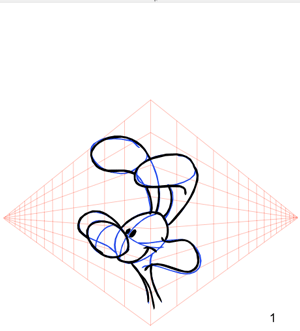
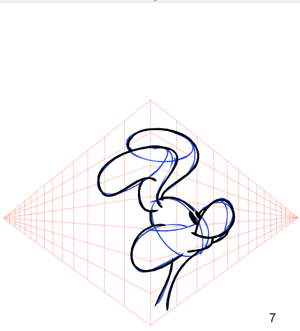
I'm doing a "take" where the character's head is turning so having a perspective reference is really a must.
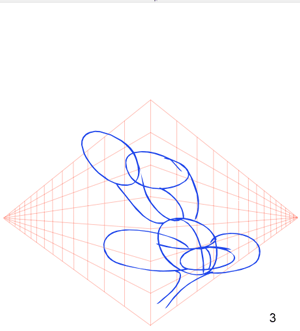
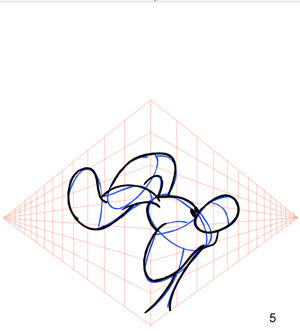
I'm just roughing in the basic forms and using the grid as my 3D reference.
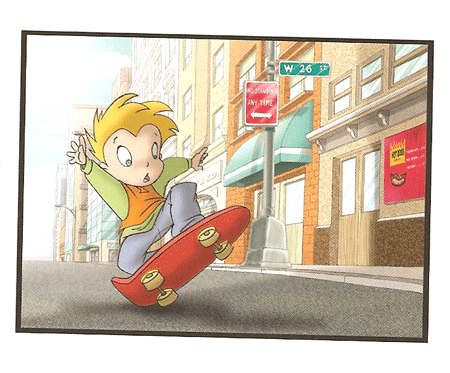
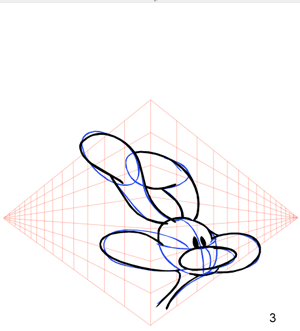
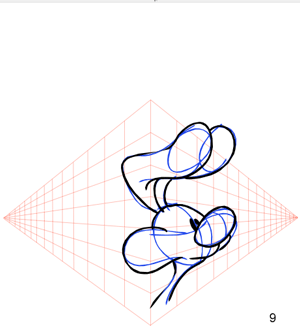
After I finish roughing out all the cells for this action I can begin to clean up using my ink color.
Below is a 72 frame test render of the "take" action I just completed. I rendered the test with the perspective grid and the frames counter. And you can see that they are both useful aids in making this animation. I can stop the playback at anytime and isolate the frame or frames where I don't like the action. And I can single frame through the playback and know exactly where I am in the sequence down to the frame. Time codes are nice but I also like to see frame numbers on my tests. A couple of creative aids made easy to re-use and apply with global library templates. I hope this inspires you to create your own as well as possibly some other animation aids that you find useful.
The first template is a frames counter. I can't keep track of how many times I would have wanted to have the current frame number displayed while I was watching a playback test. The playback viewer has a time code counter but I often see a problem and want to isolate the frame or frames where that problem exists. It also is useful in isolating sound to action sync problems. So I created a "counter" template. Now it isn't a sophisticated device, but rather a sequence of cells in an element where each cell is numbered to match the frame it occupies. For my purposes I found that 300 was a good number of frames that more often than not fit any sequence I wanted to test. Now it took a little time to create and number 300 cells but it's a one time task and you save it as a global library template and then your counter is available for any future project use. You will see it in action in a minute.
Another area in which I always find myself wanting some help is with my drawing perspective. I use to just make some guide marks in a scratch element. Then I decided that I was doing this quite frequently and so I started making and saving perspective grids as global library templates. Now whenever I need a perspective reference I can just pull out the template and put it in a reference element in any project.
Below are some samples of templates I use for perspective references in my drawing.
This template is a two point perspective reference with a below center horizon line which is great for a viewpoint looking up from ground level or "worm's eye" view.
This perspective grid template has the horizon line above the middle and is useful for a more elevated view reference.
This is a three point perspective grid template.
This perspective template is a neutral or eye level two point grid and I use this one quite often as you will see in the animation work below.
This is the timeline I'm using for this example project. I've created an element named "counter" for my frames counter template and placed it above the other elements to superimpose the frame count. If I don't want this frame count to be included in the final render all I need to do is un-check its timeline track label. I also have an element included named "perspective" which I'm using for my two point eye level perspective grid template. It is one cell with its exposure extended for the desired time I want the reference visible. Again when I don't want this included in the render I just un-check the perspective element's timeline track label. I put it at the bottom of the list so it is behind my drawings. I normally work on sketching in drawing view with the field guide grid turned off when I'm using a perspective grid because it makes things less cluttered. I can always toggle the field guide on and off if I need to check a field size.
I'm working here in drawing view with the field grid toggled "off " and the auto-light table turned "on" so that my perspective grid is visible below where I am sketching. It really makes it easier to draw solid and maintain proper perspective with this visual aid. The color of the perspective grid is a personal choice and is easy to change. Notice that the frame number is also visible. That's a nice bonus when using the counter template.
I'm doing a "take" where the character's head is turning so having a perspective reference is really a must.
I'm just roughing in the basic forms and using the grid as my 3D reference.
After I finish roughing out all the cells for this action I can begin to clean up using my ink color.
Below is a 72 frame test render of the "take" action I just completed. I rendered the test with the perspective grid and the frames counter. And you can see that they are both useful aids in making this animation. I can stop the playback at anytime and isolate the frame or frames where I don't like the action. And I can single frame through the playback and know exactly where I am in the sequence down to the frame. Time codes are nice but I also like to see frame numbers on my tests. A couple of creative aids made easy to re-use and apply with global library templates. I hope this inspires you to create your own as well as possibly some other animation aids that you find useful.
Labels: Field Guide, Library, Perspective, Tips